
Welcome to Palette knife painting stage one. Well you have bought all the tools you need, and are now loaded with oil paint. So here we go. I have made a few little video’s to assist you. And although they are a little sketchy at the moment, I will certainly improve on making them.
Laying On the Paint with a Palette Knife.
In the above video, you will note I have made a sketch drawing, on a 500×400 canvas 20″x!6 ” imperial. You can copy this from the end of my first blog, “The New Forest Drift”
A Good Sketch Pays Dividends
Make it as comprehensive as suits yourself. But above all, a good drawing assists to make a good palette knife painting, and as previously said you will cover much of the sketch as you go. Nevertheless, it is there for a guide to assist your relativity. And you will be able to use it throughout the palette knife painting to fix your subjects in the correct position.
Short Video’s to Learn From.
You can watch these video’s many times to allow yourself the freedom of expression My video’s, will be short, so that I can explain in depth the method of using the Palette knife.
The Front Edge of the Palette Knife.
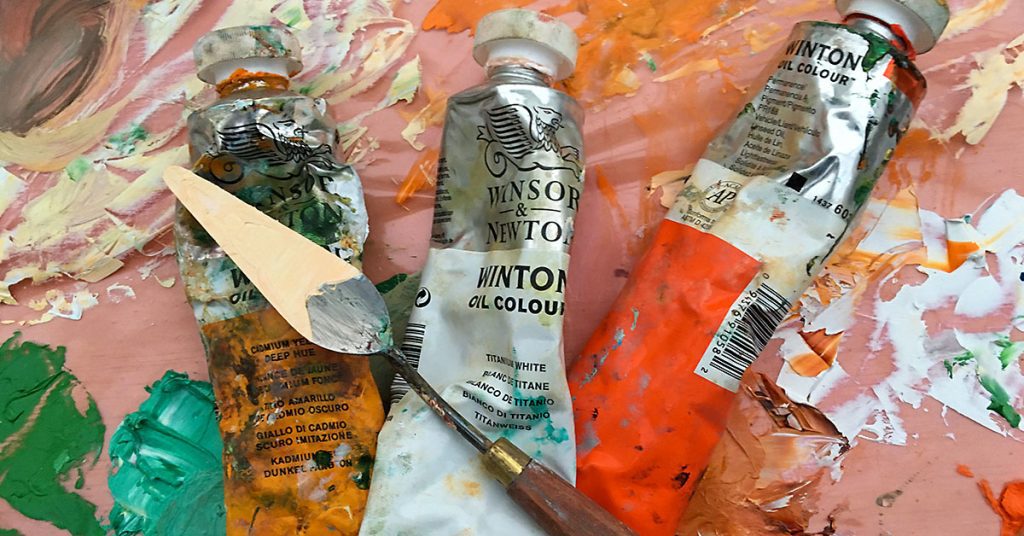
The way you use the front edge or leading edge of the palette knife is most important. As you load this edge with the oil paint, to spread on your canvas. I have used Sap Green, mixed with Viridian Green, 50-50 mix to create the desired effect of the colour I wish to paint on the canvas in my video. I am using a 3′ Palette knife.
Spreading Your Oil Paint on Your Canvas.
The direction of the palette knife when drawn over the canvas is also important. As this creates energy. When someone draws a car driving on a road they draw lines behind it to show the effect that it is moving at speed. Conversely the direction you draw your palette knife in your palette knife painting, leaving lines behind, gives the same effect. Above all, it creates atmosphere and energy. Downward strokes make your subject look still or stopped. Its important to decide which way you want your paint to run before starting a new part of your painting. Be bold when you put the paint onto the canvas. Nervous strokes make for a bad palettte knife painting. But bold strokes make a good one. Dont be afraid to experiment. After all, you can always correct your work, by adding a little more paint over your previous attempt. Or you can scrape the paint off and try again.
Using The Palette Knife Painting Video.
Above is a link to a small video. Click on it to see the method of lifting the paint onto the edge of the palette knife. Its not my best attempt at filming a video, and I’ll never be a Steven Spielburge. Even so it will emphasise, that too much paint on the knife, will sometimes ruin the effects you are striving to achieve. Its important to understand, that you can always add more paint. But its more difficult to take it away.
Using Your Next Chosen Colour, Indian Yellow.
To ceate the energy, and sunlight, I have mixed Indian Yellow with Flake white, 60-40 towards the white. Always consider when starting a palette knife painting, which direction you want your sunshine to come from!!. As all your highlights must be lit from that direction. This is one of the most important elements of your painting. Within my palette knife painting, you will note that the sunshine is coming from the right hand side of the canvas. When beginning to use your chosen yellow take a small amount of paint on your palette knife, as less is more in this instance. Use bold strokes but not too heavy! You are adding the yellow colour for light effect. And pressing to hard with the palette knife, will assist to mix the colours together, something you do not want to achieve. and you will get the wrong effect. Try to hold the palette knife a tiny bit flatter to your canvas, so that the knife slides over the surface of the colour below, it may take a few attempts, so perhaps practicing on an old canvas or board would give you more confidence before tackling it in your painting.
Video demonstration of how to lay the paint on the canvas.
The video above will demonstrate how you lay the oil paint on within your palette knife painting. Remember? its your painting. You are not really copying my painting exactly. You are just using my “New Forest Drift” for reference. The greens depict the trees and the yellow will depict the sun shining through them. Palette knife painting is a rough genre, and you will be pleasantly surprised what treats unfold in front of your eyes. You will see the effect more clearly when you stand away. Be loose. Be loose I say!! When you are satisfied with your efforts, at that moment. Stop!!, dont play with it!!, as the first strokes, can give the best effects, and the more you play, the more you lose the effects.
Viewing your achievements, in Palette knife painting.

Above is my ongoing palette knife painting. Its a fantastic feeling when you view your achievments. Even now, after many years, I find it hard to believe how my palette knife paintings evolve. But evolve they do. And when you put them into the public arena, you will feel even prouder of your work. I will show you how to put highlights in as we progress through our palette knife painting adventure. Note, that I am covering up parts of my sketch. But still have the bulk of it left, to assist my figure relativity for later in our journey.
Adding your next chosen colour, Cadmium Yellow Deep Hue Hue.

Now we are depicting more intensely, where the sunshine is coming from. To assist the effect. I have now added some Cadmium Yellow Deep Hue, (I did not mention this colour in my last blog, but it is a great colour to have in your palette). to my Indian Yellow and Flake white. This colour should be used sparingly at first, as it is very opaque and dense. I have added it to the lower part of the painting. I have also increased the amount of Viridian in the lower left of the painting, to darken up that area. Watch out !! Viridian is a very opaque colour too, be careful when using it, as a little goes a long way. and I always find some elswhere on my person?, after using it (HOW DID IT GET THERE? I NEVER UNDERSTAND HOW.)
The “New Forest Drift” Palette Knife Painting.
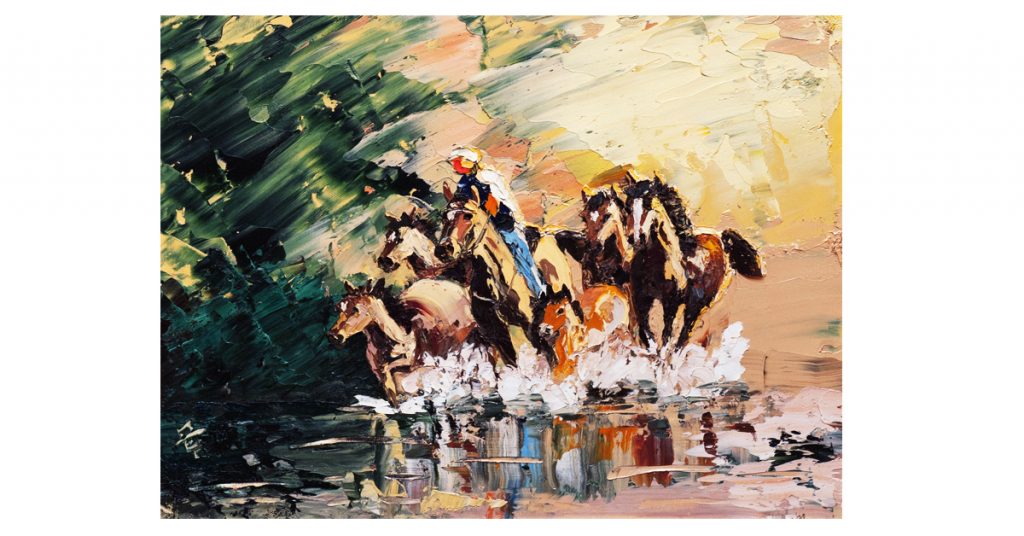
I have put a photograph of the “The New Forest Drift” in here to help you get your painting up to speed. If you have any questions after getting this far? please email me info@michaelparkerart.com I will be happy to help you, if you are struggling with any of my explanations.
One thing I will mention, YOU WILL GET PAINT ON YOUR HANDS AND CLOTHES, so its best to wear old clothes, and perhaps an artists apron. Occasionally I wear thin rubber gloves, as that helps to keep your hands tidy and clean. But HEY! thats all part of the excitement of becoming an Artist. So indulge yourself, its a great feeling.
The Exciting Part.
Next we come to the exciting part of our painting, adding the figures, and horses. I will set all this out in my next blog, enjoy your journey of painting with palette knives. THE BEST IS YET TO COME !!.
How To Paint With Palette Knives
I have inserted the above link attached to my first blog on Palette knife painting. Telling you how to purchase the materials, for anyone to be able to produce a good acceptable painting, which is the preparation for the follow up to this blog. If you havent read it already, please do, it will help, and save you time.
Okay you are ready. Now go ahead and give yourself a fantastic experience.
ENJOY!!.
Best WIshes,
Michael Parker.

Comments are closed.